Using Your DSLR Video 9 Tips

Using Your DSLR Video 9 Tips

(See original Article that I wrote for Dublin Photography Schools Snapshot Magazine here)

Altough video functionality on Digital SLR’s has  been  with  us for a while now, many photographers were initially sceptical of it’s usefulness.  However over the last number of years DSLR‘s have gained more ground and are being used by everyone from big budget productions like, House and The Tudors, to a generation of youtubers and vimeo users.  While many of us have yet to dip our toes into any form of video production, those of us that have are often surprised by the attention to detail and intricate nuances  that good production value requires.

Here are a few tips on how to get the most out of making videos on your DSLR camera, so you can avoid some of the common pitfalls that many novices coming from photography to film production often encounter. The best way to approach video shooting is to have the mantra – “similar but different”.  Like with photography, get as much as possible right at point of shoot, this includes things that we often take for granted like, white balance and level horizons. These can be difficult to fix in post production.

1. Set Your Frame Rate
One of the first things to be done is to set the correct frame rate. The higher the frame rate the smoother your video will look. Set your camera to 24 FPS (frames per second) for a movie look, or 30 FPS for an HD look.

2. Get It Rght In Camera
As photographers we often have the luxury of changing information and cropping areas out in post production. Unfortunately this is not really an option with video without severely compromising the video quality. Make sure to double check your settings before you begin.

3. Similar Yet Different
Video and photography share many of the same principals; however they differ in areas like ISO and shutter speed. If you are filming handheld, make sure you keep your shutter speed  double  your frame rate as a rule of thumb. For example if shooting at 30fsp =1/60th of a second.

4.  Turn off Autofocus
When moving around your camera will try to live focus and while this technology has improved in recent years, it is still a long way off perfect. Focus tracking will often go for a walk while filming busy scences so be sure to pop your camera into manual focus.

5. Purchase An External Mic
The audio that your camera records can be very poor quality. The microphone is too close to the internal workings of the camera and threfore also records the internal workings of the camera such as VR, AF , humming and button pressing noises. We recommend purchasing a zoom mic or a hot shoe mic.(see my blog about getting clean audio on a DSLR here)

6. Magic Latern
If you are serious about using your DSLR video function then take a look at  ‘Magic Latern’. It will open up the firmware in your camera  and will allow you many more options than your camera came with. Be warned however, this is open source firmware and loading it will void your warranty.

7. Use A Tripod/Monopod
If shooting a video handheld, your camera will record every bump, shake and rattle your hand makes. Invest in a good tripod or monopod and use it.

8. Storyboard
If you are doing a little bit more than some impromtu filming at an event, like making a short youtube video, then have a look a making a ’story board’. This means making some simple drawings of shoots, like a childs story book, so your scences make logical sense to your viewer.

9. Post production
This is where it all comes together. Final Cut, Premiere Pro and Avid are all common post production packages in the industry. If only dabbling in the area then consider looking at, iPhoto, Serif  Video, Windows Movie Maker or even Picasa. Your storyboard will be an invaluable tool when editing.

Dublin Photography School Will be introducing a DSLR Video Course in Dublin In Late Summer 2015, And will teach beginners how to shoot better videos with there dslr cameras and will include techniques such as zooming, panning, pull focus, prefocus, framerates etc so keep an eye out.
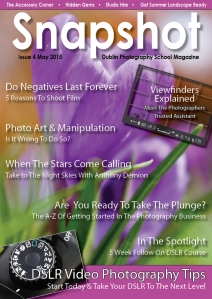
DPS Snapshot Photography Magazine Issue 4 Free Download Online Now

Snapshot Magazine Issue 4

Snapshot  is a  FREE online downloadable magazine produced by the staff and trainers at the Dublin Photography School. In each issue we will bring you guest articles from photographers around the country,  we will let you know what’s going on in Dublin and around the country with photography events, seminars, competitions, exhibitions, talks and much more. We will discuss “what’s hot and what’s not” in the world of photography products as well as tips and techniques to help you improve your photography. Here it is guys, ISSUE 4 of Snapshot – the Dublin Photography School online interactive photography magazine. Once again we would like to thank all of our very talented contributors as without them it would not be possible. I am sure you will all agree with us that it is a beautiful visual display of imagery with so may great articles and tips included. Spread the word, pass it on, share it on your own pages and let’s get it out there! Available to download here: http://goo.gl/XvMFbT

Snapshot is Ireland only free online downloadable magazine produced by the staff and trainers at the Dublin Photography School.

Snapshot is Ireland only free online downloadable magazine produced by the staff and trainers at the Dublin Photography School.

Using a graphics tablet for photo editing (a beginners guide.)

Using a graphics tablet for photo editing

graphics tablet for editing photos

graphics tablet for editing photos

Something that a lot of digital imaging enthusiasts and professionals recommend is if you are getting more serious about your post processing then you will benefit hugely from picking up a graphics tablet. I must say I’m inclined to agree with that advice. Now don’t get me wrong, I’m not saying you have to rush out and buy one the first day you sit your Photoshop course, but it is something that you should have a look at as you move from the beginner’s phase of learning into the intermediate and advanced stage.

Trying to figure out what tablet to buy can be an absolute nightmare for somebody who is new to digital imaging and post processing, so here is a quick guide set out in a FAQ format that will help you. I’m also going to offer my advice for the best tablet on a budget, for anybody looking to buy their first tablet and stylus.


Graphic Tablet & Stylus FAQs.

How does a graphic tablet differ from a mouse?

This is the most common question and the simple answer is two areas, the first one is accuracy, the pen offers the ability for much more finer control when making local adjustments in Photoshop such as air brushing, painting, history brush, dodging and burning etc, the second area is the stylus can be set to be pressure sensitive so the strokes you use are much more natural looking creating a smoother looking effect.

What are good brands of graphic tablets and styluses?

Hands down the industry leader in graphic tablets is Wacom, but other quality brands include Huion, VT, and Ugee, however support for these other brands can be hit and miss depending on where you live. Other computer component manufacturers like trust and advent make tablets, but are not flagship products and replacement stylus’s etc can be hard to come by.

How much do tablets cost?

This is where most people trip up, the price of tablets range from about €50 to €2500, and most people have no idea how much to be spending on a tablet that will give them good quality and value for money without massively under or over spending.

How much should i spend on a graphics tablet?

For the average amateur or semi professional photographer it’s my opinion that you should be spending somewhere between €90 – €200, without buying a lemon or massively over spending, you may be tempted to spend much more, but may not get the use out of the features are these may be geared towards professional animators or digital artists.

Do I need to take a course to use a graphics tablet?

Not at all, essentially your just replacing your mouse with a much more accurate pointer, however your Photoshop skills will need to be in place first to get the most out of the stylus, my advice would be to focus on learning local adjustment techniques like portrait retouching and learning shortcut commands that allow you to scoot around the screen like the spacebar and ctrl + 0 ctrl + and ctrl -, to help you get the most out of your tablet.

Are they difficult to get used to?

For the first half hour using it you will find it tricky as you get used to such a sensitive tool, after that you will not notice that you’re using it at all. My advice is because when we use a pen we are used to looking at what we are writing. With that in mind, when you start using one your instinct will be to look at the track pad or tablet instead of the screen, don’t ! Just keep looking at the screen and it will become second nature in no time. Also don’t worry about setting pressure sensitivity straight out of the box, spend a week or two just using the basic functions and when you’re ready just do a quick Google search on setting up the advanced features. It’s really very simple.

What do I recommend to my students?

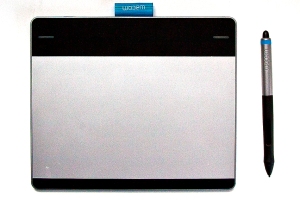
The tablet I recommend to my students is the Wacom Intuos Manga, it costs about €120 depending on where you buy.

Wacom Intous Manga for editing photos

Wacom Intous Manga for editing photos

It’s just over the size of an A5 page and is light and compact


Wacom Intous Manga is just over half an a4 page in size

Wacom Intous Manga is just over half an a4 page in size

It’s thin and slim so easy to carry around in a camera bag or laptop case.

It’s thin and slim so easy to carry around in a camera bag or laptop case.


Has quick access buttons to the modify keys like alt, control and shift.

Has quick access buttons to the modify keys like alt, control and shift.

Has quick access buttons to the modify keys like alt, control and shift.


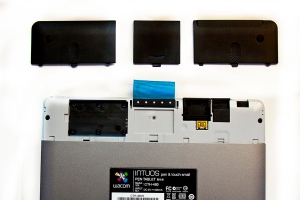
Can be easily upgraded to a wireless device with wireless add on kit.

Can be easily upgraded to a wireless device with wireless add on kit.

Can be easily upgraded to a wireless device with wireless add on kit.

If you enjoyed this article have a look at our free downloadable photography magazine Snapshot, for articles, tips, tricks and much more.

Stewart Kenny is a Photographer, educator and photography tour guide living in Dublin, Ireland. When not on the internet pretending to be a blogger, enjoys drinking tea and martial arts and zombie flicks! See more of his work on his photography site here.

Getting Good Sound While Recording Video On DSLRs

 Video  and film course Video  and film course dublin

Video and film course dublin

Best option for getting clean audio on DSLRs

When recording video on Canon, Nikon, Olympus and Sony DSLRs, one of the major complaints that most people have is the quality of the audio. This is not so much to do with the bit rate etc, but more hiss, pops and rattling sounds that seem to punctuate even the quietest of scenes.

So what’s the problem?

The problem is very simple, it’s more of what may be considered a design flaw by some or more of a trade off for others, the microphone is embedded in the camera body, so this means getting any clean audio is nearly impossible, because the mic will record the internal workings of the camera, i.e., the cameras focus drive, image stabilisation and any slight rattle from the strap or a button pressed while the user is recording.

So how can I fix it?

To be honest in my opinion the audio from the camera is a write off, unless you have the time, patience and skill to spend hours cleaning it up in a program like adobe sound booth, even then with cleaning, compression and hiss removal the sound file you end up with may have a muffled or unnatural sound so this may not be the best option.

So how can I get clean sound when making a video on a DLSR?

The solution is simple; the original problem is that the mic is embedded in the camera body, so the best solution is to move the mic outside the camera?


How do I do that?

Very simple, you need to buy an external mic, these are a dedicated microphone that either sit in your cameras hot shoe or can be placed off camera anywhere your audio is being recorded.

So what are the two ones you can recommend on a budget?

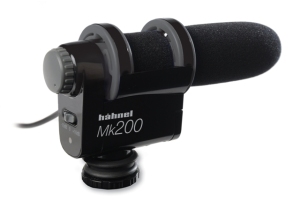
The first one if you’re literally just looking to remove clicks and pops is the Hanhel MK 200. Its affordable is easy to pick up in local camera shops in Ireland and the UK. It’s small light weight and sits right in your hotshoe, and records audio directly into the video file, the only downside is that it has limited recording options and your camera needs to have a microphone jack.

hanhel mk200 external mic

hanhel mk200 external mic

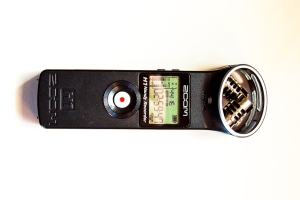
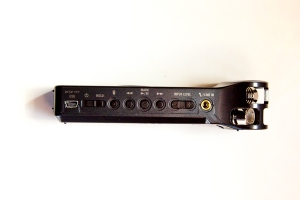
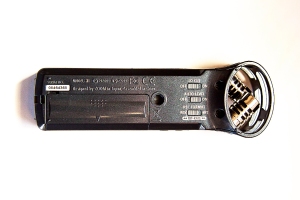
The second option is the one I would most highly recommend for more serious users, who are looking to work on a few home or college projects or even just start making a few short videos. Is the Zoom H1 Handy Recorder and starts from about €100-€140 and is perfect for one looking for flawless audio without breaking the bank.

Zoom H1 Handy Recroder review

Zoom H1 Handy Recroder

It’s very small only 4 inches x 1 inch and packs a ton of features for such a little piece of hardware, its user interface is easy to use and intuitive and allows you to choose what format you would like to record your audio on WAV or MP3. I think by far its most impressive feature is the auto level feature, which limits noise levels and limits the effects of loud bangs or background noise. Having used this a few times now the files are ready to go straight out of the mic, however the more technically minded of you out there may want to give them a quick clean anyway.


Zoom H1 Handy Recorder

Zoom H1 Handy Recorder

Zoom H1 Handy Recorder

Zoom H1 Handy Recorder

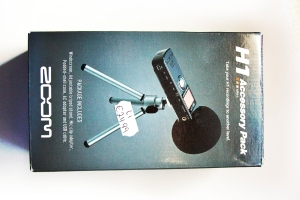
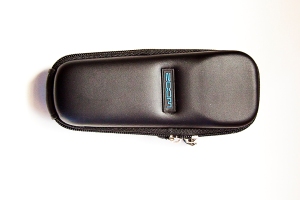
One thing I really liked about buying the Zoom H1,was the option to buy a handy accessories kit that included a windshield, a handle a wrist strap and carry case to name a few for an extra 25 euro….well recommended.

Zoom H1 Handy Recorder

Zoom H1 Handy Recorder

Zoom H1 Handy Recorder

Zoom H1 Handy Recorder

Overall I was very impressed with it and while either option will work well, it will all depend on what level user you are and where you see your videos going in the future.

If you enjoyed this then have a look at April’s edition of DPS Snapshot Magazine in which we give you some great tips on shooting video on your DSLR and will be announcing details of our New DSLR Video course we will be launching in Dublin in May.

Snapshot is a free photography magazine showcasing some of the best photography in Ireland.

Snapshot is a free photography magazine showcasing some of the best photography in Ireland.

Stewart Kenny is head of training at Dublin Photography school, as well as working as a photographer, he is also a designer and photogrpahy tour guide, leading photography holidays in Ireland, as well as holidays to Iceland, morocco and other destinations for Travel Department.

www.dublinphotographyschool.ie

looking to sit a photography course in dublin or ireland then visit http://www.dublinphotographyschool.ie


Dublin Photography School are Dublin’s foremost provider of short and part time photography courses in Dublin and surrounding areas and teach all levels from beginners, improvers to advanced students in all areas of photography including Studio, Photoshop, Lightroom, Beginners DSLR, Flash, to name but a few, if you’re looking for a short photography course anywhere in Ireland why not have a look here.