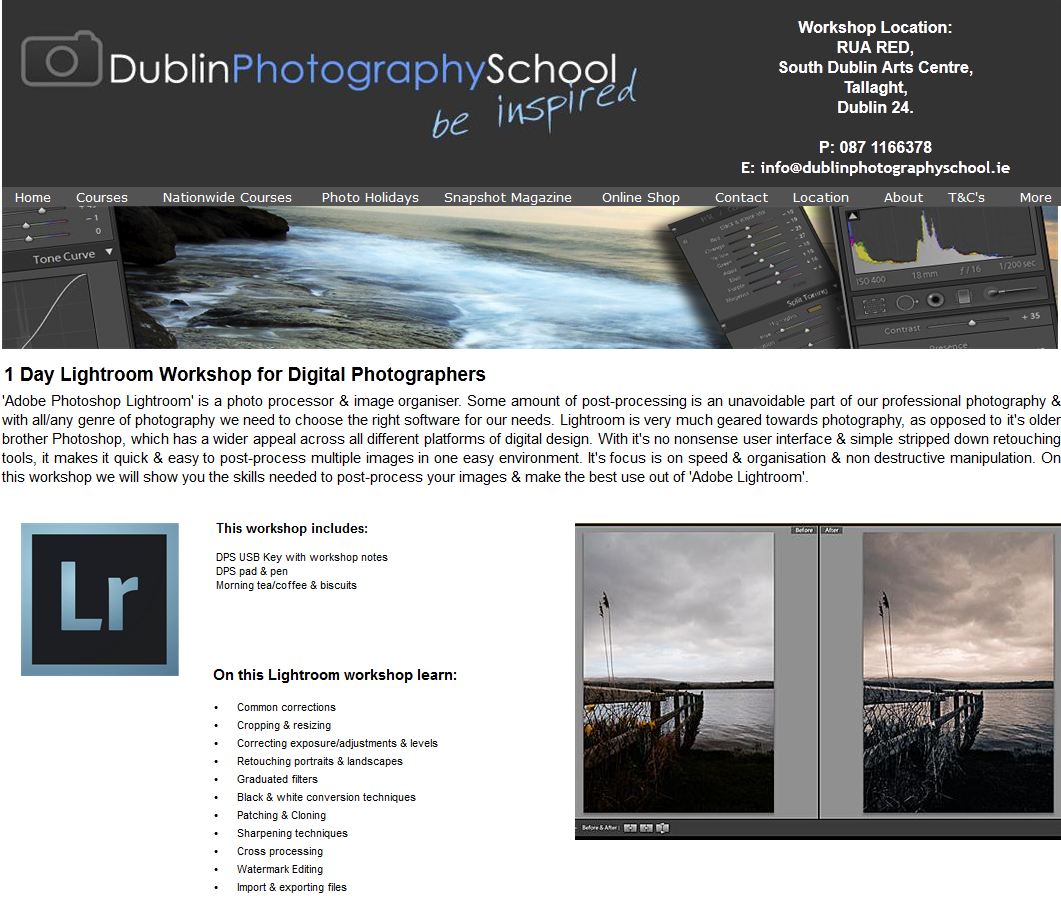
Using a graphics tablet for photo editing
graphics tablet for editing photos
Something that a lot of digital imaging enthusiasts and professionals recommend is if you are getting more serious about your post processing then you will benefit hugely from picking up a graphics tablet. I must say I’m inclined to agree with that advice. Now don’t get me wrong, I’m not saying you have to rush out and buy one the first day you sit your Photoshop course, but it is something that you should have a look at as you move from the beginner’s phase of learning into the intermediate and advanced stage.
Trying to figure out what tablet to buy can be an absolute nightmare for somebody who is new to digital imaging and post processing, so here is a quick guide set out in a FAQ format that will help you. I’m also going to offer my advice for the best tablet on a budget, for anybody looking to buy their first tablet and stylus.
Graphic Tablet & Stylus FAQs.
How does a graphic tablet differ from a mouse?
This is the most common question and the simple answer is two areas, the first one is accuracy, the pen offers the ability for much more finer control when making local adjustments in Photoshop such as air brushing, painting, history brush, dodging and burning etc, the second area is the stylus can be set to be pressure sensitive so the strokes you use are much more natural looking creating a smoother looking effect.
What are good brands of graphic tablets and styluses?
Hands down the industry leader in graphic tablets is Wacom, but other quality brands include Huion, VT, and Ugee, however support for these other brands can be hit and miss depending on where you live. Other computer component manufacturers like trust and advent make tablets, but are not flagship products and replacement stylus’s etc can be hard to come by.
How much do tablets cost?
This is where most people trip up, the price of tablets range from about €50 to €2500, and most people have no idea how much to be spending on a tablet that will give them good quality and value for money without massively under or over spending.
How much should i spend on a graphics tablet?
For the average amateur or semi professional photographer it’s my opinion that you should be spending somewhere between €90 – €200, without buying a lemon or massively over spending, you may be tempted to spend much more, but may not get the use out of the features are these may be geared towards professional animators or digital artists.
Do I need to take a course to use a graphics tablet?
Not at all, essentially your just replacing your mouse with a much more accurate pointer, however your Photoshop skills will need to be in place first to get the most out of the stylus, my advice would be to focus on learning local adjustment techniques like portrait retouching and learning shortcut commands that allow you to scoot around the screen like the spacebar and ctrl + 0 ctrl + and ctrl -, to help you get the most out of your tablet.
Are they difficult to get used to?
For the first half hour using it you will find it tricky as you get used to such a sensitive tool, after that you will not notice that you’re using it at all. My advice is because when we use a pen we are used to looking at what we are writing. With that in mind, when you start using one your instinct will be to look at the track pad or tablet instead of the screen, don’t ! Just keep looking at the screen and it will become second nature in no time. Also don’t worry about setting pressure sensitivity straight out of the box, spend a week or two just using the basic functions and when you’re ready just do a quick Google search on setting up the advanced features. It’s really very simple.
What do I recommend to my students?
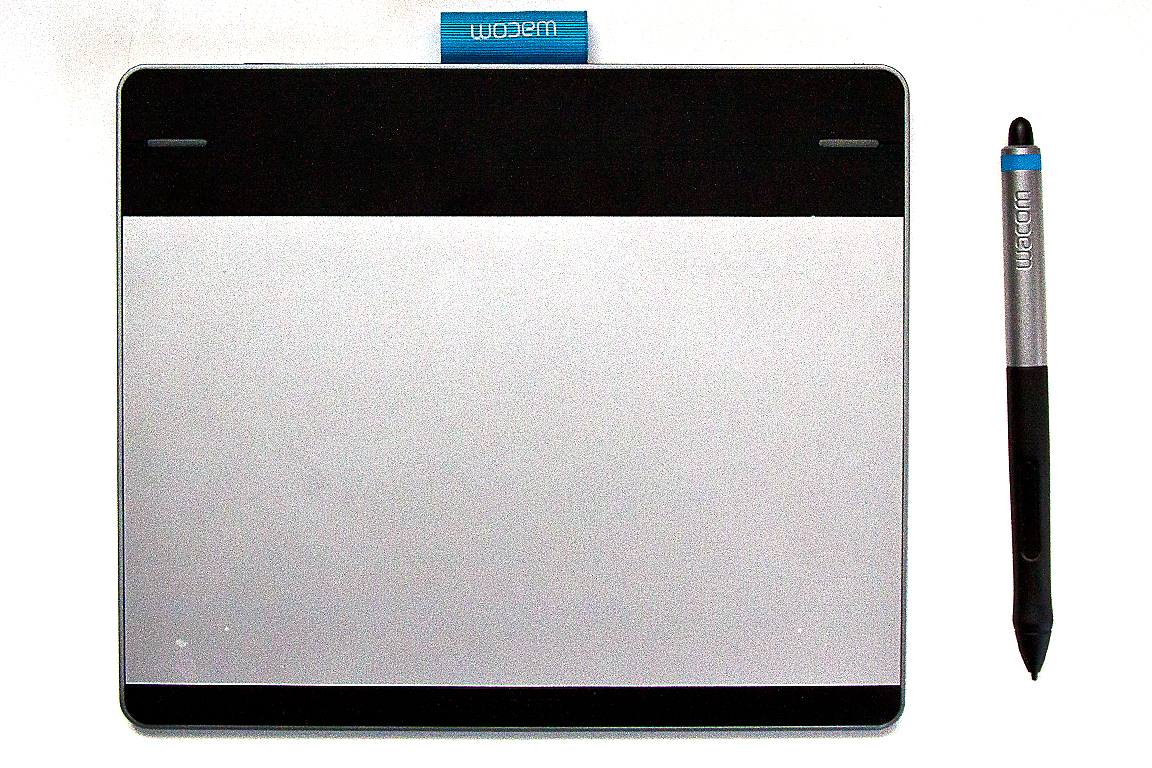
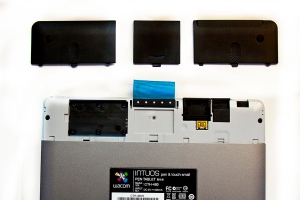
The tablet I recommend to my students is the Wacom Intuos Manga, it costs about €120 depending on where you buy.

Wacom Intous Manga for editing photos
It’s just over the size of an A5 page and is light and compact

Wacom Intous Manga is just over half an a4 page in size

It’s thin and slim so easy to carry around in a camera bag or laptop case.
Has quick access buttons to the modify keys like alt, control and shift.

Has quick access buttons to the modify keys like alt, control and shift.
Can be easily upgraded to a wireless device with wireless add on kit.
Can be easily upgraded to a wireless device with wireless add on kit.
If you enjoyed this article have a look at our free downloadable photography magazine Snapshot, for articles, tips, tricks and much more.
Stewart Kenny is a Photographer, educator and photography tour guide living in Dublin, Ireland. When not on the internet pretending to be a blogger, enjoys drinking tea and martial arts and zombie flicks! See more of his work on his photography site here.
53.349805
-6.260310